
Model Credit: Alan Fletcher on location in my studio.
Canon 1Ds Mark III
Canon EF 70-200mm f/2.8L IS lens
ISO 100, F14 @1/200th sec
I’ve been working with Australian actor Alan Fletcher for nearly 20 years now. We first met when he joined the cast of Australia’s longest running soap Neighbours. We done so many shoots over the years I’ve actually lost track. Alan is also a very talented musician and photographer. It was Alan who first taught me about looking for warmth in the eyes of a portrait.
This shot was taken for Alan’s annual Christmas card. He wanted a Christmas looking theme so we workshopped this idea together.

My lighting set up for this shot includes two large softboxes to create the highlights on the sides of Alan’s face, one medium Rotalux deep octabox as a main light and a small Rotalux deep octabox (camera left) to create some fill light in Alan’s body.
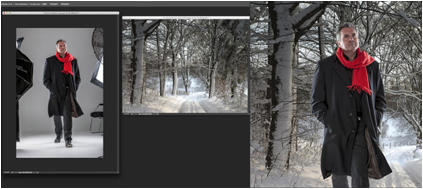
In Australia, Christmas is smack bang in the middle of summer. And the last major snowfall in Melbourne was in 1956. Flying to the nearest mountain was out of the question so we settled on the next best thing and that was to create a photo composite.
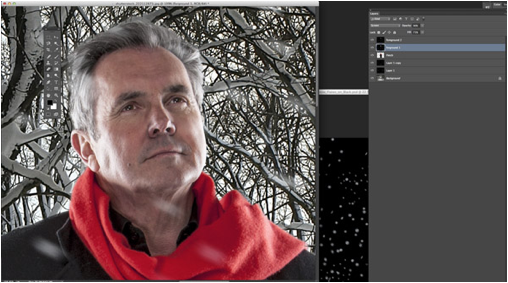
Step 1
I’ve cut Alan’s image out using the pen tool and refine edge and then dropped it into the background I bought from Shutterstock. If you are lucky enough to live where there is snow then, you could skip this step altogether!
Step 2
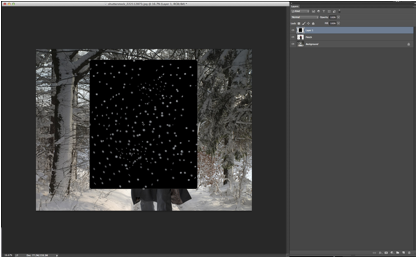
To make the “snow” I’ve created a new document in Photoshop using clip art snowdrop graphics (white dots will also work) pasted randomly on a black background. I’ve varied the sizes and shapes to give a more realistic feel. Then I’ve added this onto my original image.
Step 3
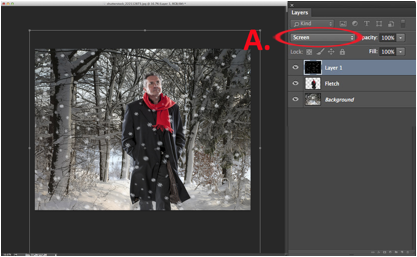
I’ve then increased my “snow” layer to be the same size as my original document.
(Edit -> Free Transform) and my blending mode is set to screen (A.)
Step 4
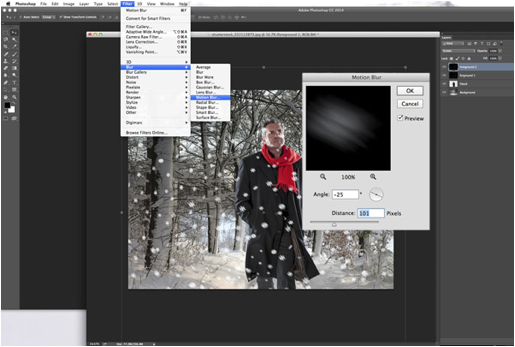
I next duplicate my layer and add motion blur to each layer (at slightly different intensities) to give a more realistic appearance of snow falling. I’ve also changed the opacity on of each layer because snow isn’t always the same density.
Step 5
Next I use the eraser tool with snow layers selected and erase any snow that is covering Alan’s eyes or too much of his face. I’ve also added two more layers of snow behind Alan to give my image more depth.
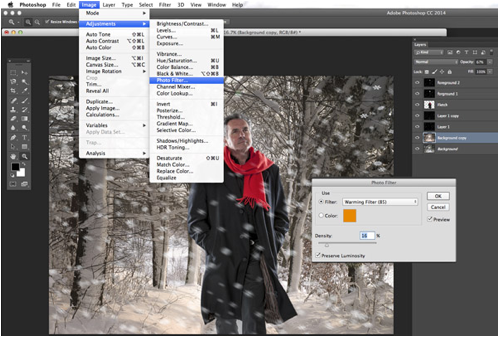
Step 6
Finally I’ve duplicated my background and added a warming filter image -> adjustments -> Photo Filter -> Warming Filter

