If you’re just starting out or don’t have a big budget then you might not have fancy lighting options. But that doesn’t matter. Because you can create high-end looking portraits by using cheap lighting!
In this episode, Gina and Valerie discuss what you need to so that you can achieve awesome looks by using everyday lighting options that you can find in your home. They also discuss what cheap entry level lighting will work best if you’re just getting started and suggest useful accessories that can make a big difference to your photography.
Click play to listen to the podcast or find it on iTunes here. If you don’t use iTunes you can get the feed here, or listen to us on Stitcher radio.
Show notes
Useful link
Via Ian Hulme
Thieves busted with $30K of stolen Nutella
What is the definition of high-end lighting?
All light behaves in the same way
The main difference between high-end lighting and cheap lighting
- Build
- Colour temperature
- Consistency
- Power
- Bells and whistles like the ability to control the power, ttl, high speed sync, focus of light beam
When is it important to spend the big bucks on lighting?
If you are shooting high-end advertising campaigns or high volume work or shoots that can’t be reshot like events, weddings it’s important to have gear that is reliable and works
I started with very cheap continuous lights.
What are the advantages of using continuous lighting for photographers who are starting out?
- having any lights is better than no lighting at all
- work with daylight first then introduce continuous lighting to add a dook of light
- work your way up from 1, then 2, then 3, then 4 lights
The main advantage of continuous lighting over flash is:
- Cost
- Simplicity
- You can see how the light affects your model or product
What kinds of lights?
Cheap as chips
- Lamp
- Torch
- LED
- Fluoro garage lights
Spend a few bucks more
- Lighting kits with stands or LED
- Best-selling continuous output lighting
- Ring lighting
Other accessories
- Scrim
- White sheet
- Shower curtain
- Tracing paper
- Diffusor
- Clamps
- Wooden pegs
If you can try and get daylight globes for your lights. These are light globes that have a specific colour temperature
White balance
This is a name of a process that removes colour casts from images to create a neutral image. The colour is balanced
Our eyes are really good and calibrating color and removing casts in light.
That’s why you don’t notice blue light in the morning
Warm light in the evening
Flouro lighting
Cameras do a pretty good job with auto white balance.
Basically the camera can be set to automatically set WB ( find a neutral colour or no cast)
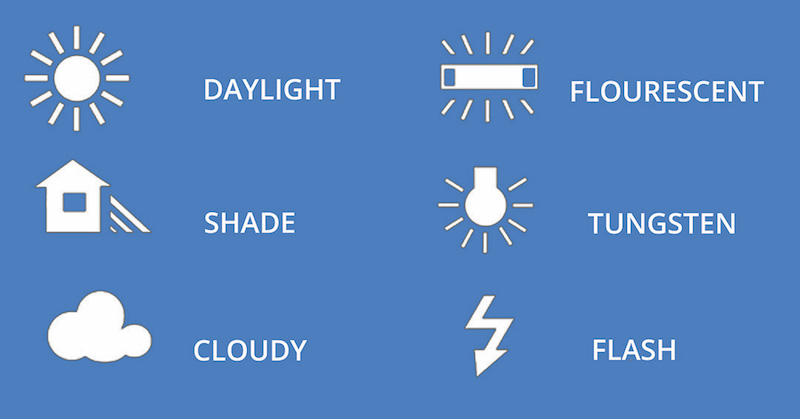
Light can be measured by colour temperature or kelvin
Color Temperature Light Source
1000-2000 K Fire/Candlelight
2500-3500 K Tungsten Bulb (old school)
3000-4000 K Dawn/Dusk(no clouds)
4000-5000 K Fluorescent Lamps
5000-5500 K Flash
5000-6500 K Daylight Sunny (no Clouds)
6500-8000 K Thin cloud cover
9000-10000 K Overcast
As beginners don’t worry about colour temperature. Convert images to BW or shoot in BW so that you can focus on what the light is doing.
Get the look right
Check out EP 68 Skin Deep: How to colour balance and expose skin tones
More advanced use a grey card in the shot or hold a white sheet of paper in front of your model to get a white balance and adjust your image in postproduction
MacGyver Hack
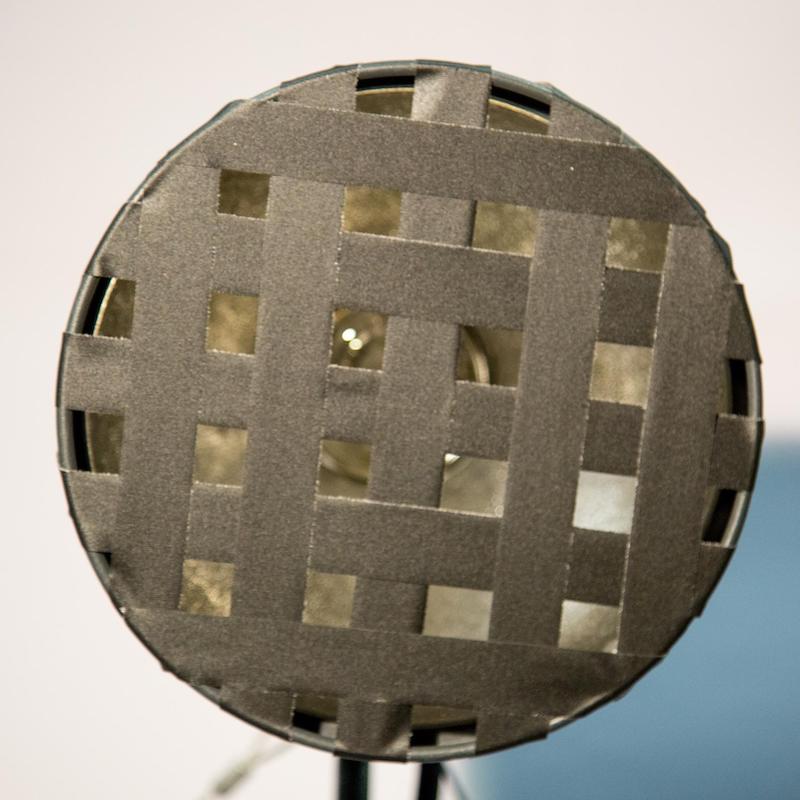
Studio lights that are too powerful for shallow depth of field portraits can be easily hacked to reduce power using Gaffer tape in a grid formation
In this example above approx 50% of the light is covered with black gaffer. The beauty of this hack is that it does not affect colour temp or create any shadows.
Adding more Gaffer will reduce the power of the light even more.
- Results will vary depending on the original power output of the flash.
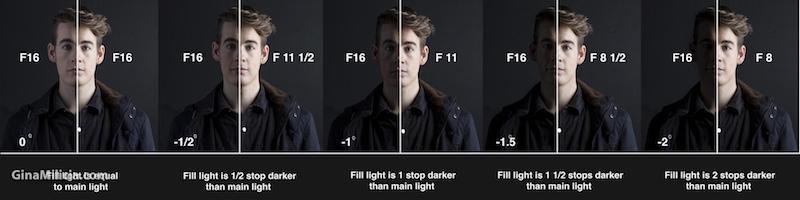
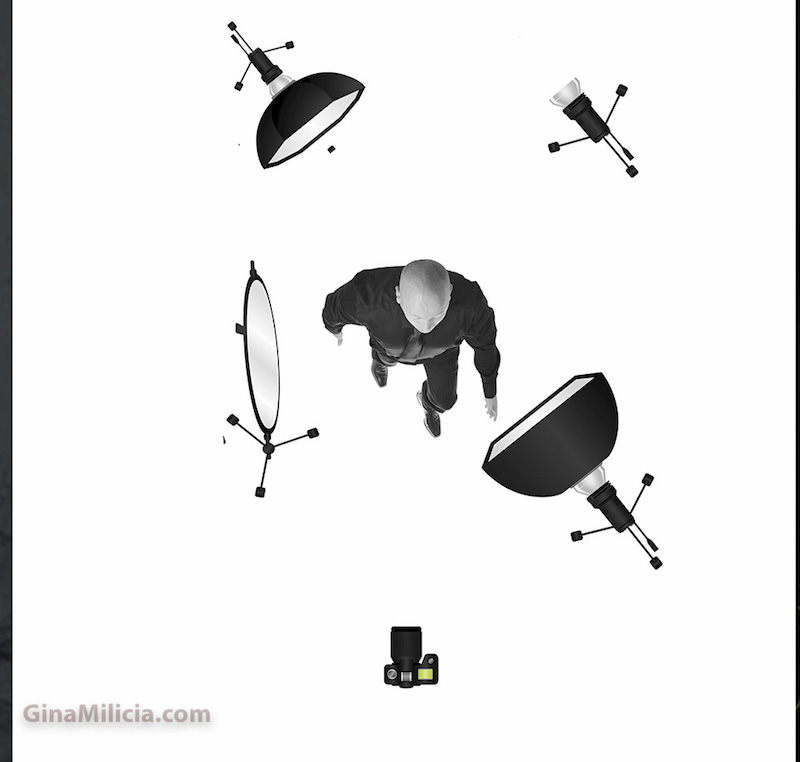
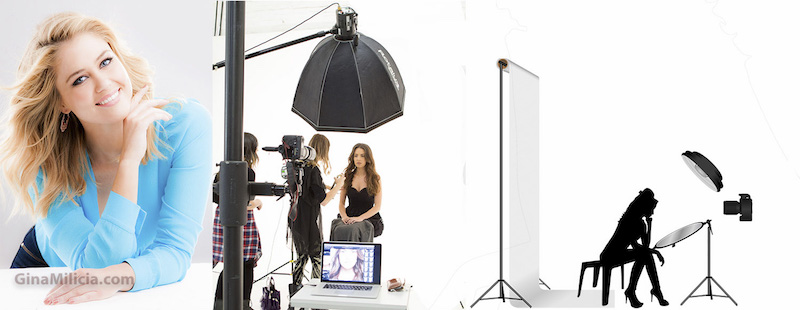
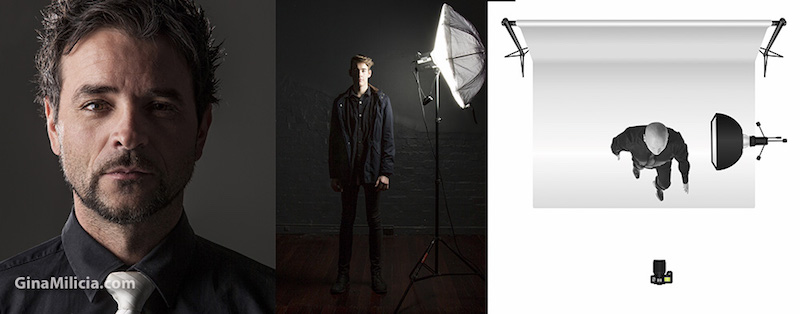
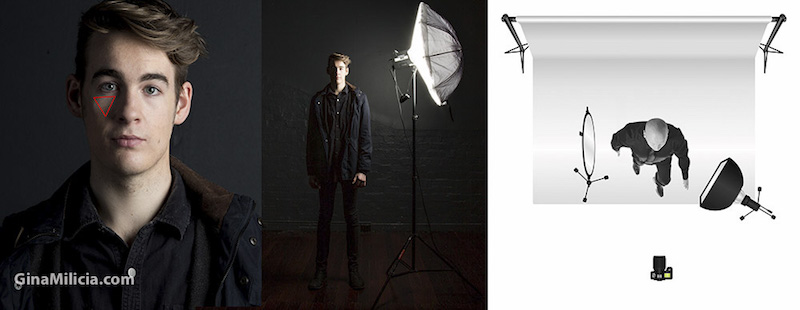
Lighting styles