How to get the perfect exposure in any lighting condition.
You’ll discover: how the camera reads light and how to override the default settings; the 3 main metering modes and when to use them; the common lighting conditions that confuse your camera’s metering system and what to do about it; how to get the perfect skin tone in every lighting situation; how to override the default settings and take your images from average to amazing!
Gina and Valerie hope you enjoy the podcast.
Sign up to the newsletter for great tips and free Lightroom presets.
Join the dynamic Gold Membership in our Community which delivers monthly tutorials, live mastermind and lots of behind the scenes videos into the creative process.
Click play to listen to the podcast or find it on iTunes here. If you don’t use iTunes you can get the feed here, or listen to us on Stitcher radio.
Show Notes
Listener Question
Shannon Hanna Cagle:
Experimenting with backlighting. Shot this pic of my daughter on Nikon 3500 f/3.2 50mm ISO 100. Lightroom is still a mystery I’m trying to solve so I edited on my iPhone with Snapseed. CC welcome. Thanks so much for all the great info in the podcasts!
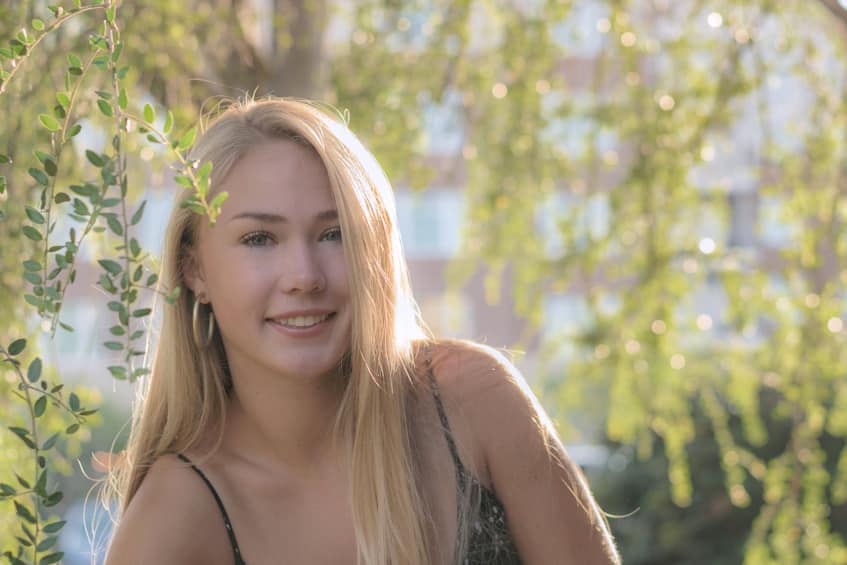
Gina’s feedback is in this episode!
How to get the perfect exposure in every lighting condition
If you are happy taking generic, average shots using your camera’s auto settings then you should probably skip this episode.
If you want to create unique images and control exposure and mood of your images then it’s important to understand how your camera’s metering system works.
On this episode of the podcast, you’ll discover :
- How the camera reads light and how to override the default settings
- The 3 main metering modes and when to use them
- The common lighting conditions that confuse your camera’s metering system and what to do about it
- How to get the perfect skin tone in every lighting situation
- How to override the default settings and take your images from average to amazing!
1. Camera meter reads reflected light
The inbuilt light meter in most cameras is amazing. Hans is the guy who designed this system and he is a genius. Seriously, in most cases, your camera is spot on and when I say spot on, I mean your camera will give you consistently average readings.
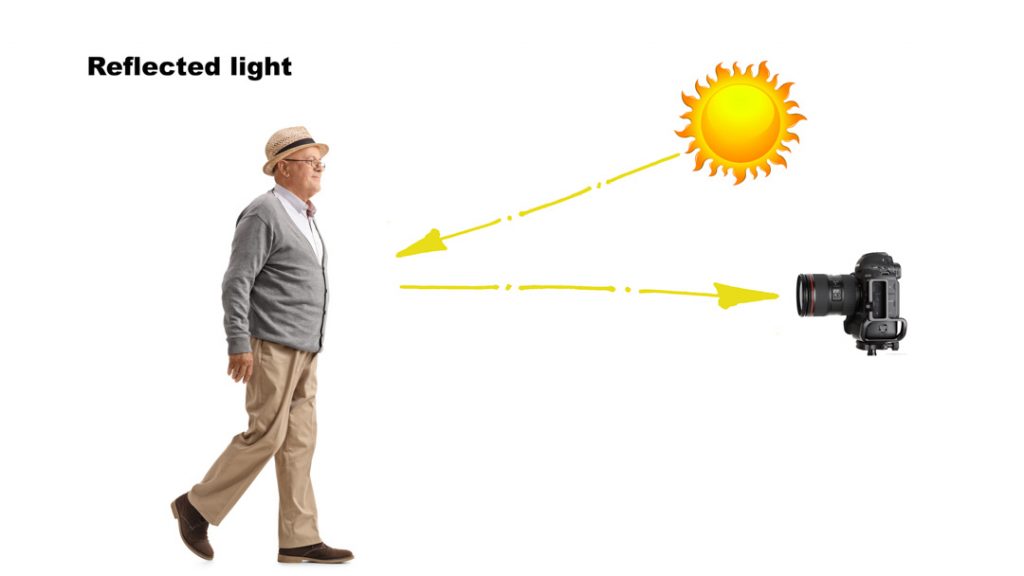
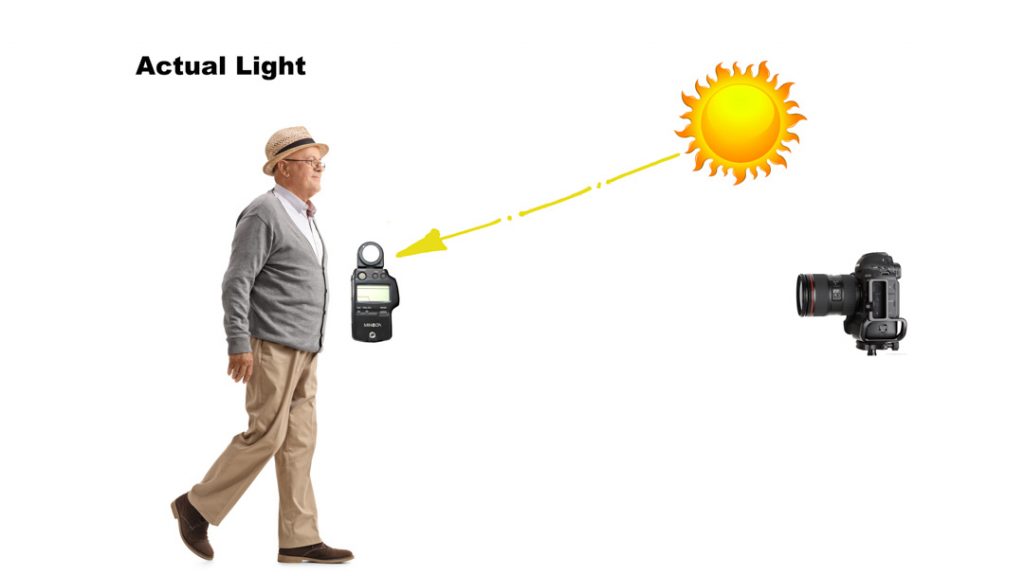
A light meter reads the actual light hitting your subject.
The camera meter reads the light that is reflected off a subject.
This works fairly well in many situations but it’s been programmed based on average readings
Certain situations where the camera’s light meter runs screaming
Snow or bright subjects
Black or dark areas
Skin tones
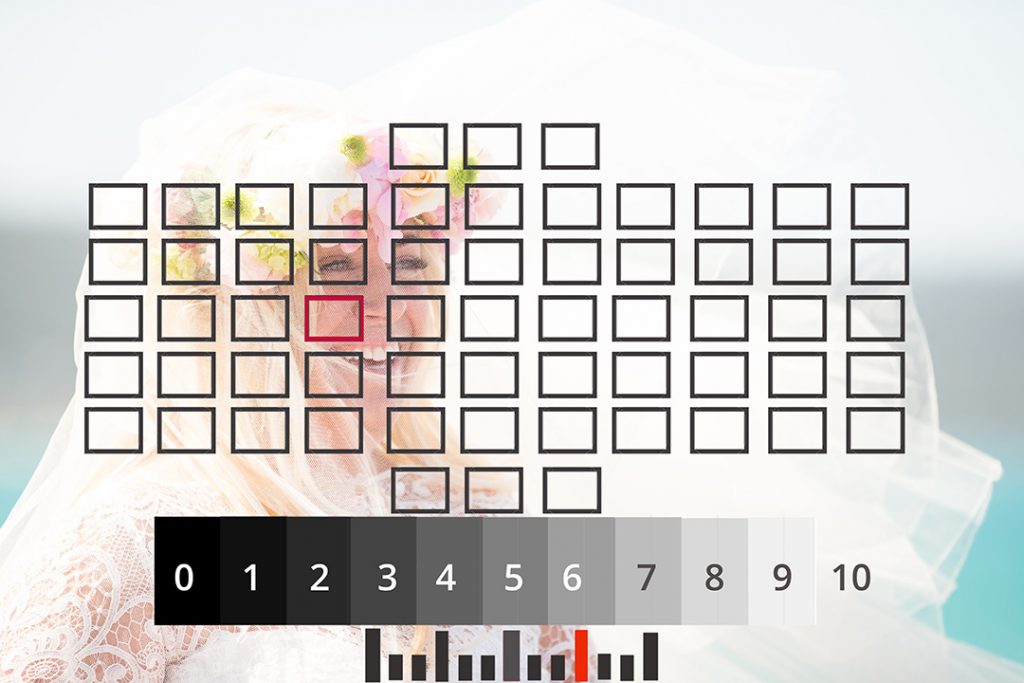
How the metering system works.
To help us understand why the camera gets confused, let’s look at how the metering system works.
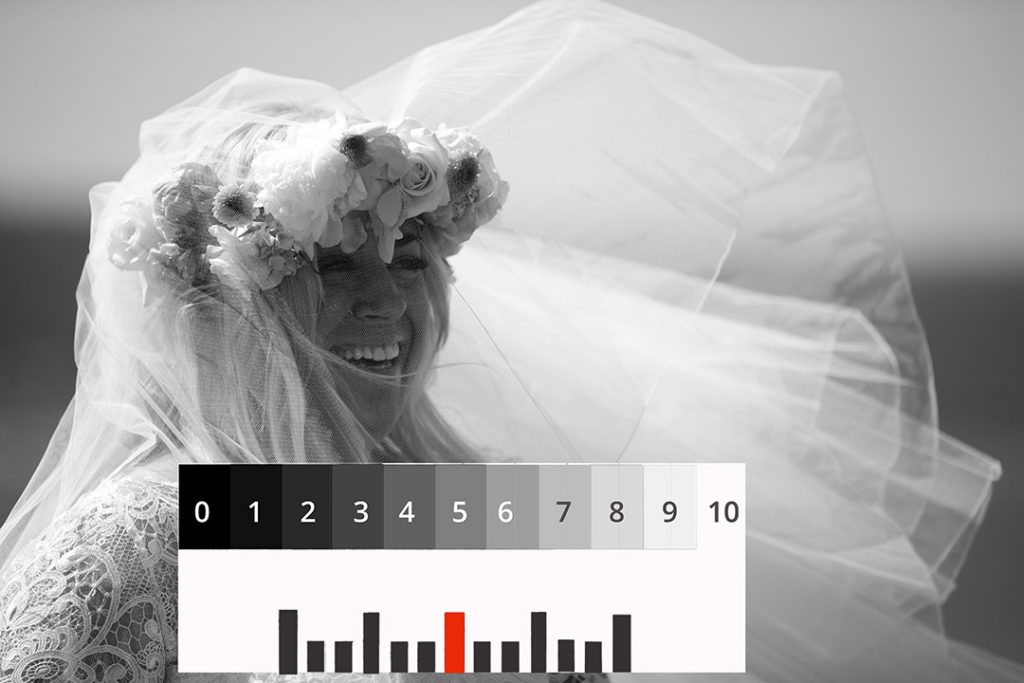
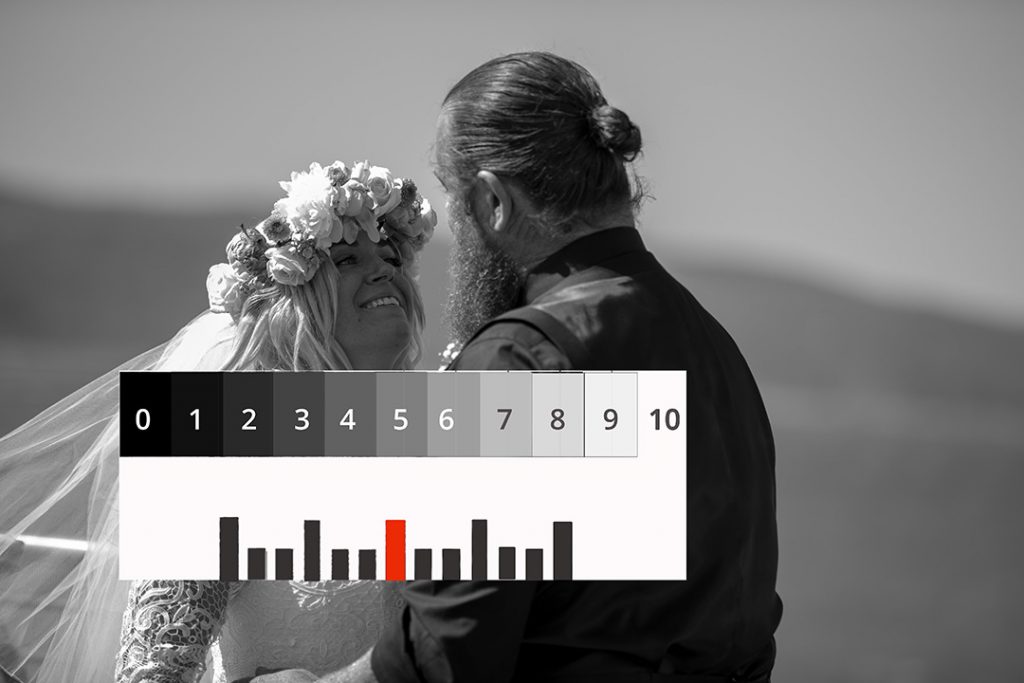
The camera is colourblind.
It sees in tones of grey or greyscale
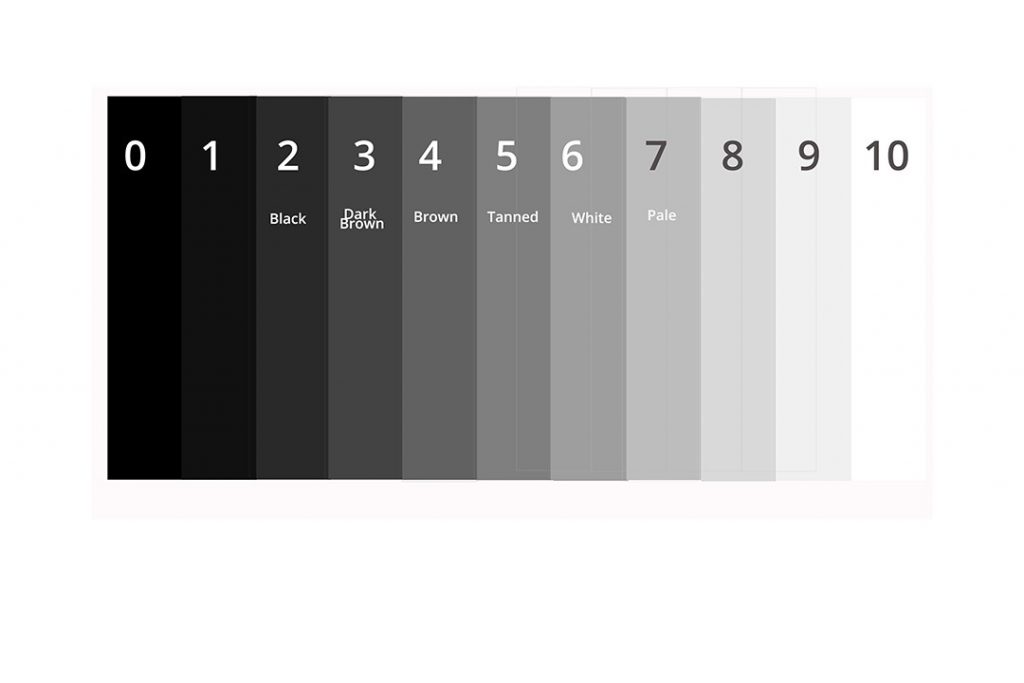
It will look at any given scene and measure the brightest to darkest areas and calculate the best AVERAGE setting for the scene.
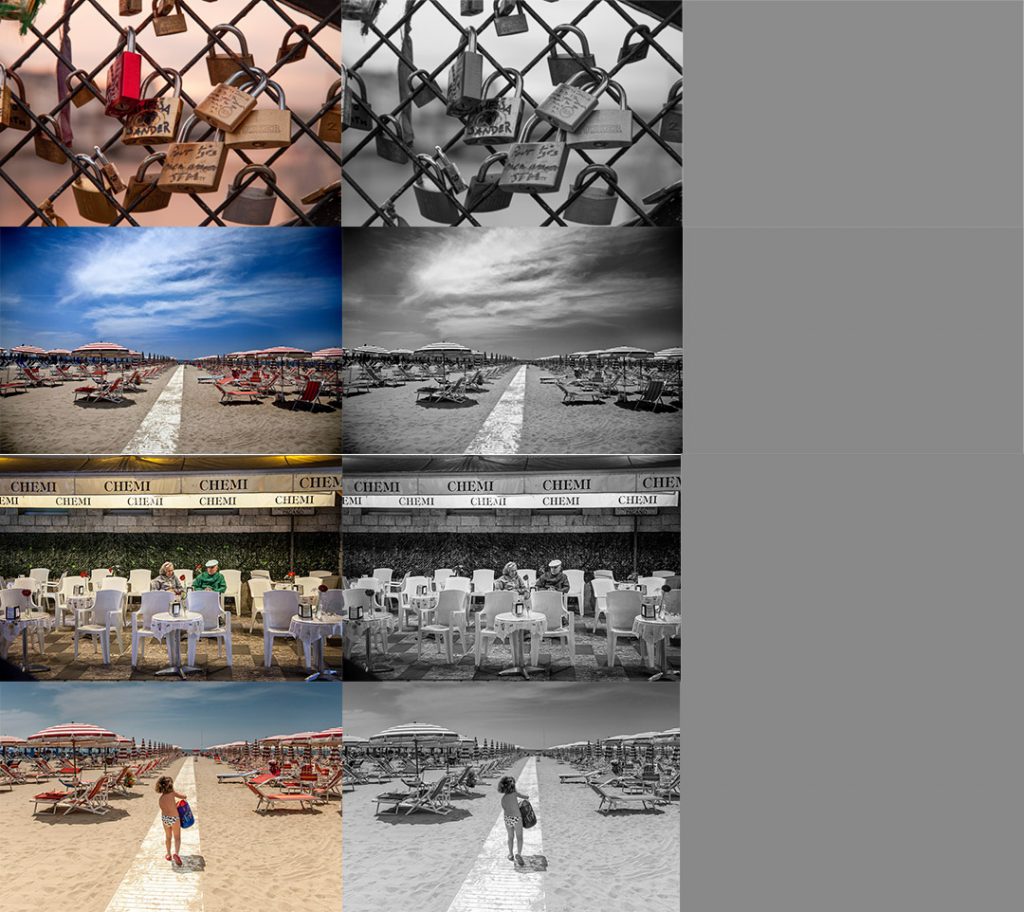
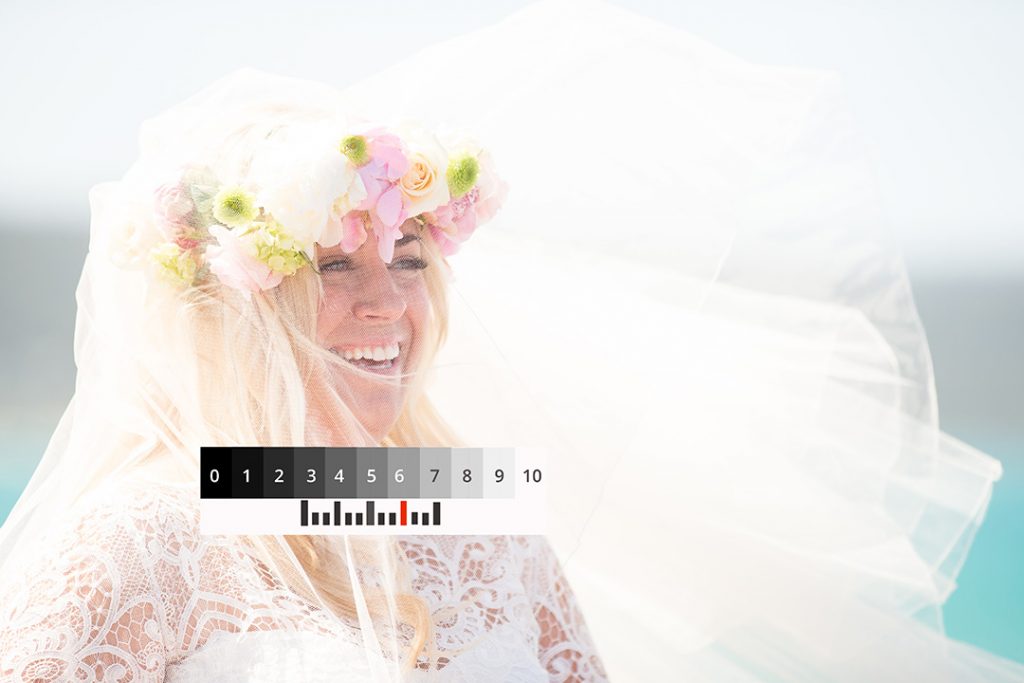
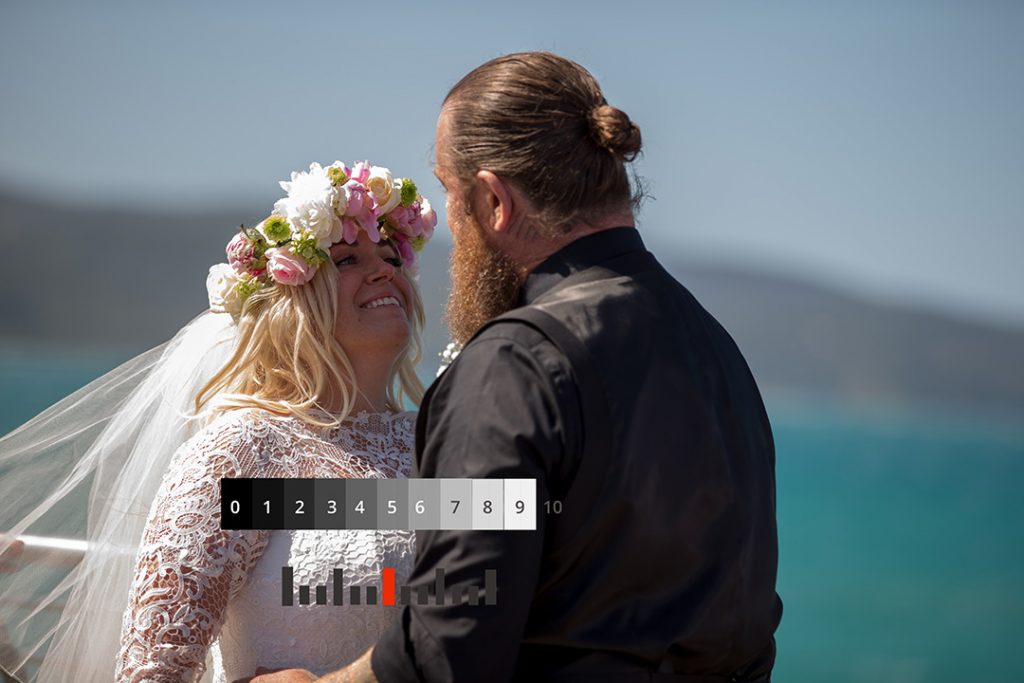
To demonstrate how this works I’ve taken 4 images photographed at the correct exposure, converted them to Black and white and blurred the images to show the average or mid-grey is the same in all examples.
If you shoot in average settings, then this system works perfectly fine. Good job Hans!

 Metering can completely change the look and feel of an image
The camera is not that smart
Try shooting in the following conditions:
- Darth Vader sitting on a black leather couch in a room painted black
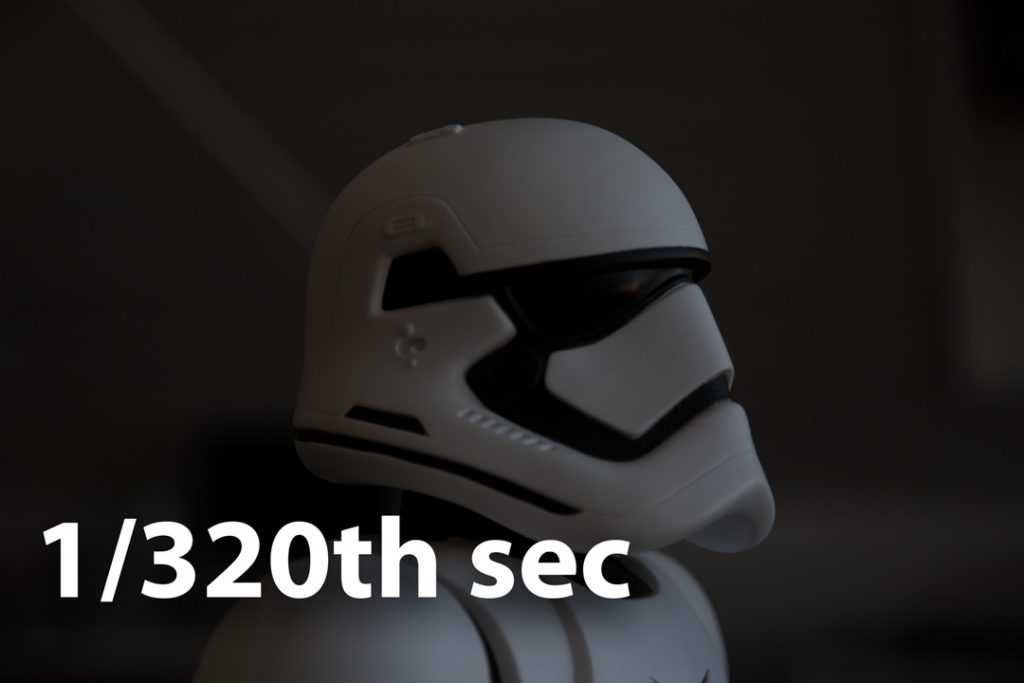
- Stormtrooper on a white couch in a white room.
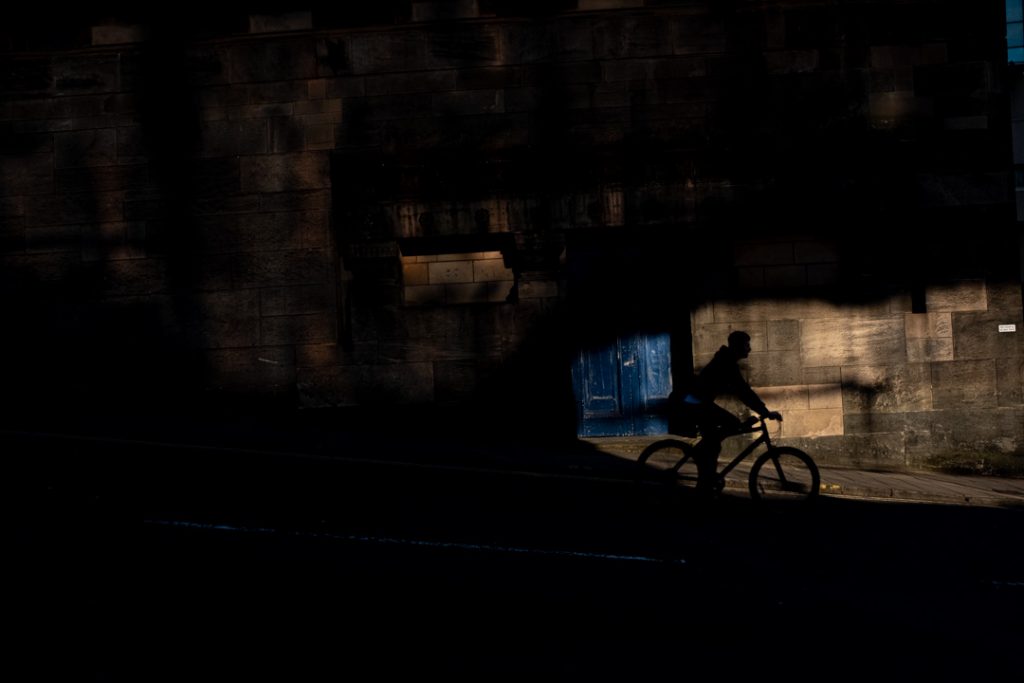
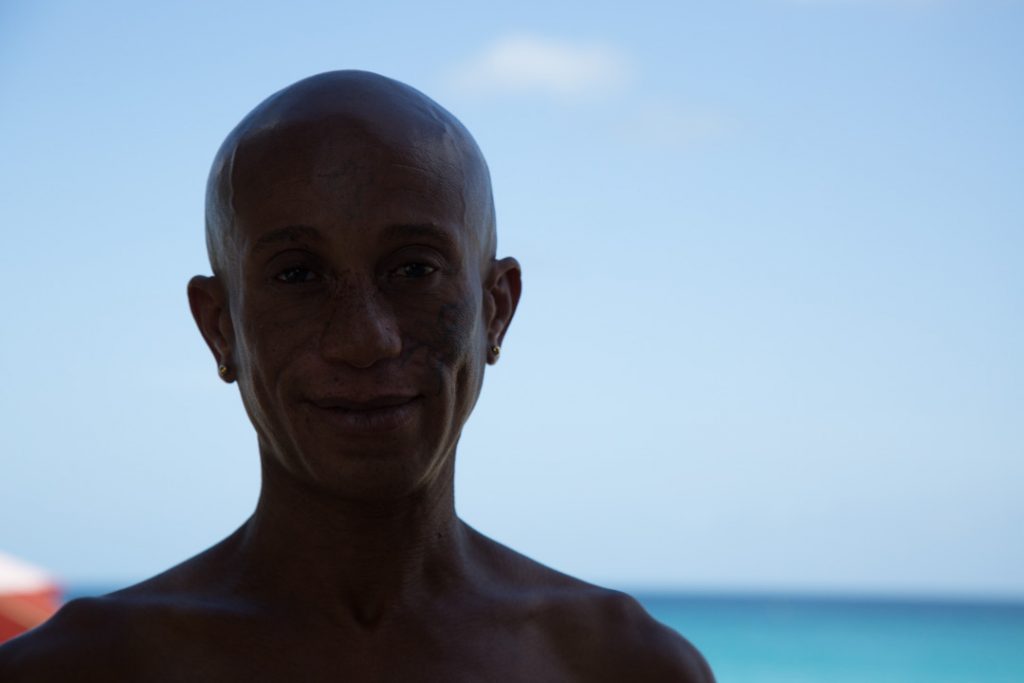
- A backlit portrait


If you want to take creative control of your images you need to override the default settings.
To change metering modes some have a dedicated button (looks like an eye)
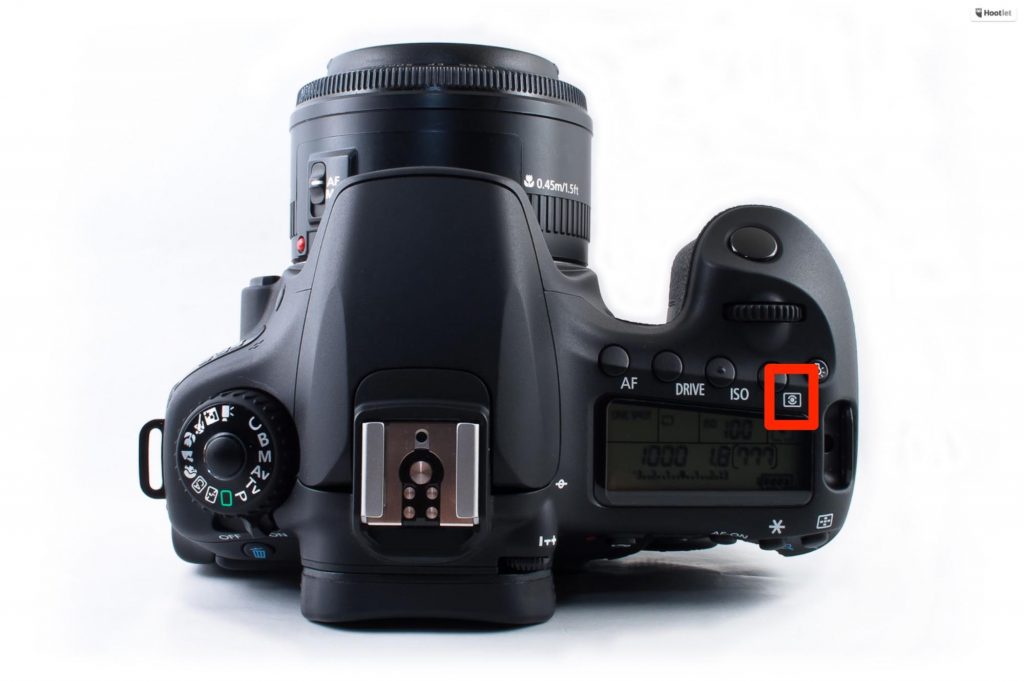
If you own a more basic camera metering mode may be found in in the menu button
Otherwise, apply the RTM protocol (read the manual)
Every camera light meter has slightly different preferences based on the individual camera manufactures.
How metering works
If you are shooting on auto mode the camera will automatically select the best exposure based on your metering preferences. It will continually update camera settings depending on what’s in the background.
If you are shooting in Manual mode the camera will suggest the best settings based on the exposure meter.
The exposure meter is located in the viewfinder at the bottom or running up the side ( when you look through the viewfinder)
Nikon +2 +1 0 -1 -2
Canon -2 -1 0 +1 +2
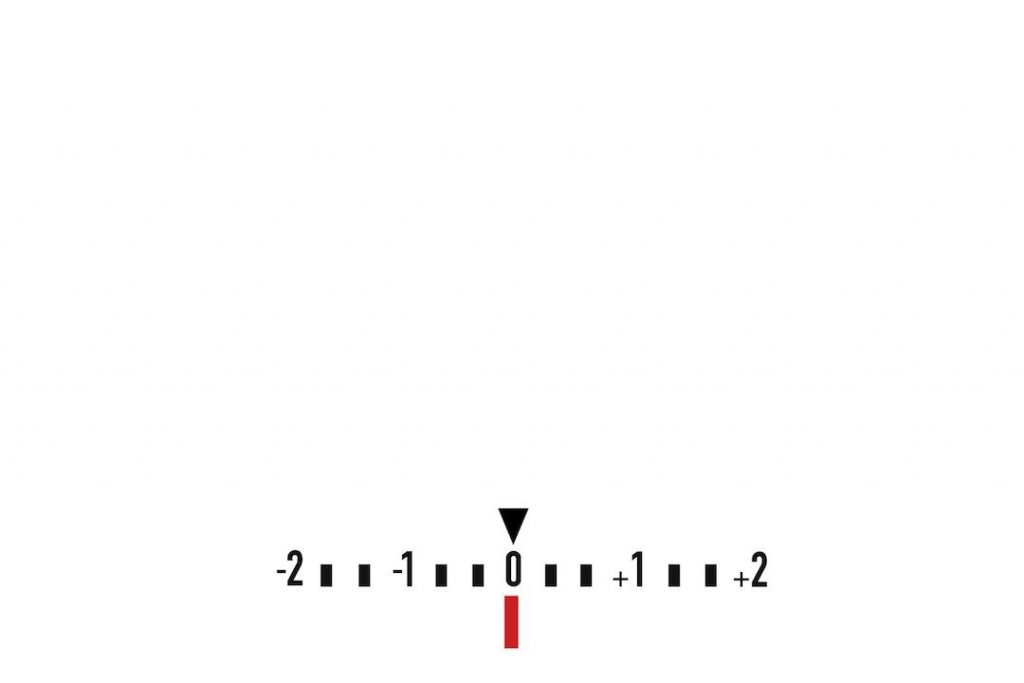
A “correct” exposure will have the meter pointer at 0
Overexposed 1 stop will be +1
Underexposed 1 stop will be -1

1. Centre-weighted metering
Centre-weighted metering measures the light from the whole scene but places more emphasis on the centre.
This is a good mode to use for portraits as it reads the area around the centre of the frame, right where your portrait subject will be. Centre-weighted metering also compensates for brightly lit backgrounds.
2. Spot metering
Spot metering takes a single reading from a small area in the centre of the frame. This is a good mode if you need to get an accurate light reading from a small area on a brightly lit plane, like a backlit couple walking in the distance and many photographers love using it for portraits because it allows you to accurately meter off skin tones
The problem with spot is it measures such a tiny area that if you misplace your spot in a very bright area like the veil on a wedding dress or a dark mole on someone’s face, the exposure will vary drastically
3. Matrix metering or evaluative (the default setting on all cameras)
Matrix metering divides your image into segments and takes a reading based on the average of brightest to darkest. This is a good all-rounder to choose and I use matrix metering as a starting point for my daylight shoots.
This is the default setting on all of my shoots because it allows me to get an average reading of the background
The default setting of all camera metering systems is the Matrix or evaluative system.
If you took all the skin tones in the world and blended them together you would probably get an average of mid-suntanned skin.

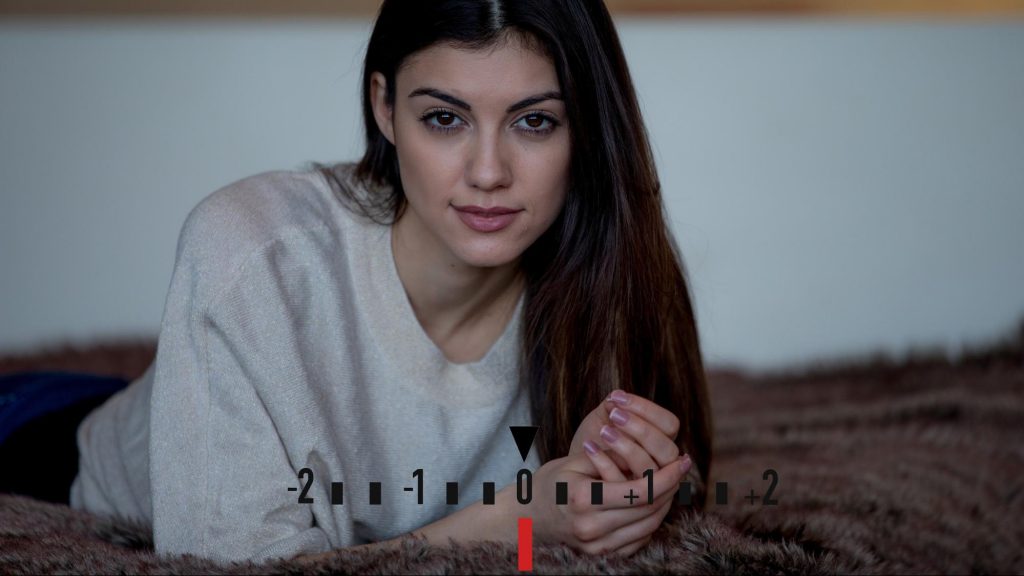
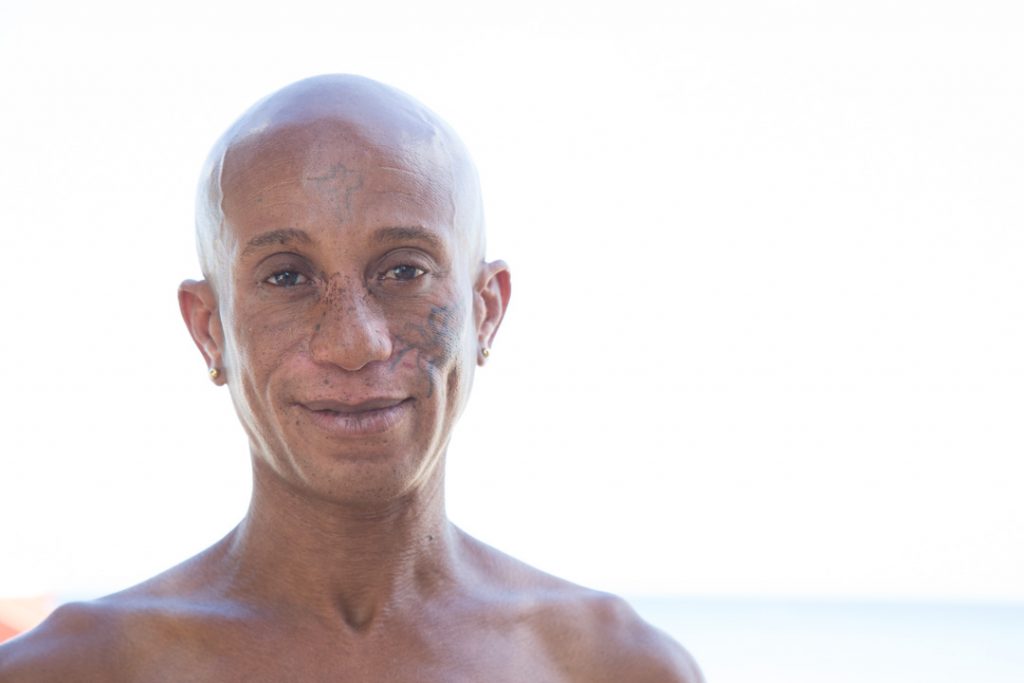
Skin tones based on Hans’ 50 shades of grey formula. This is a correct exposure according to the camera’s meter but the skin tone looks too dark. This is because my friend Lou has fair to light skin and Hans assumes that everyone has tanned skin.
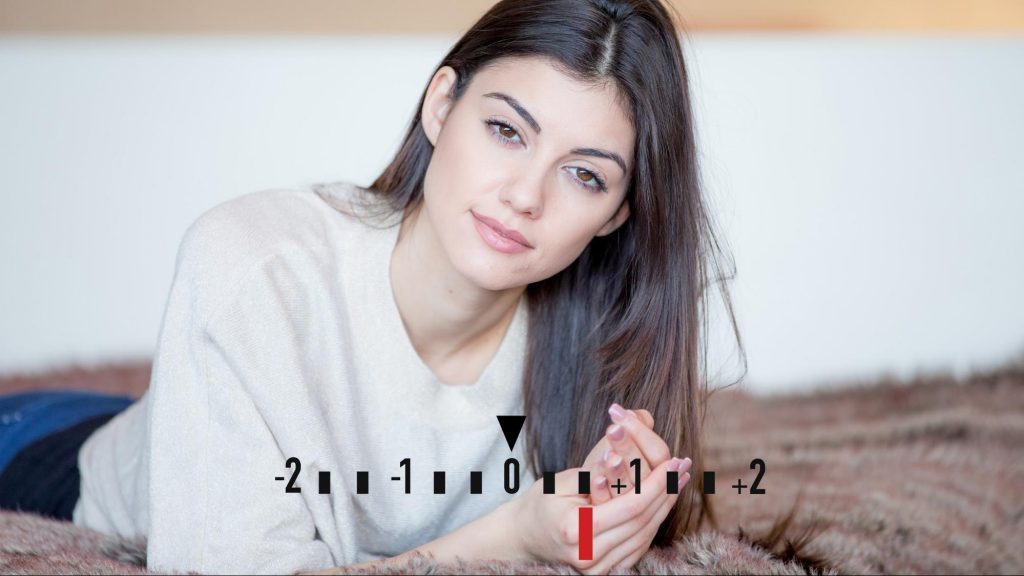
 When I adjust my setting and overexpose the image by 1 stop her skin tone starts to look more realistic


Metering off the skin
This can be a little confusing because the same points the camera uses to focus are also being used to take meter readings.
At this stage I’m not focusing my image, I’m taking a light reading. Once I’ve established my skin tone, I will set my exposure and go back and focus on the eyes of my model.
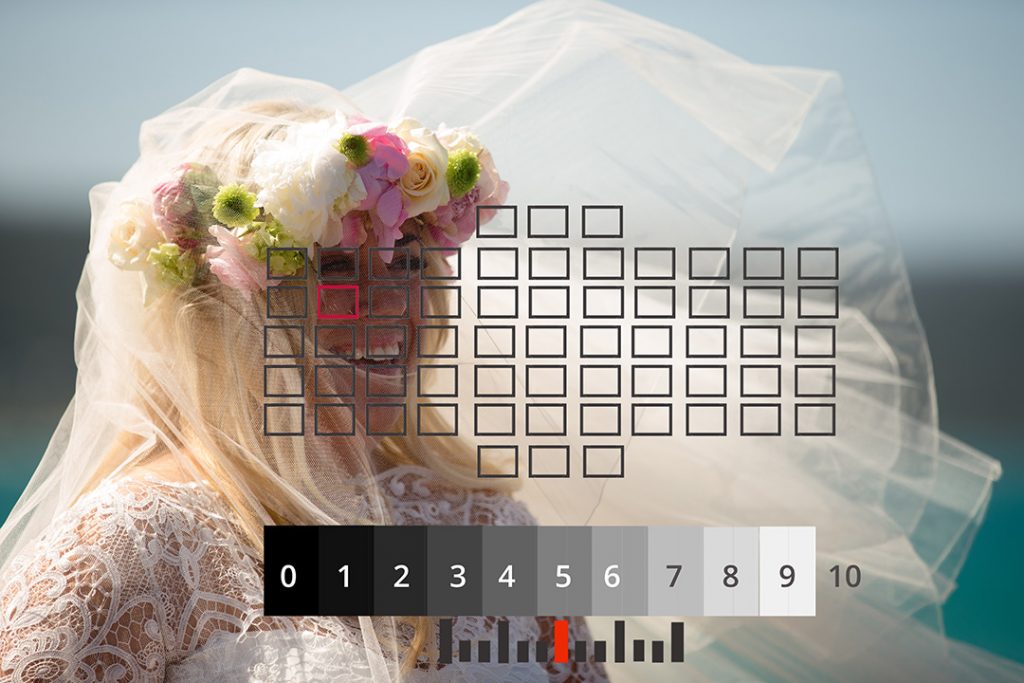
When my camera is set to Matrix or evaluative metering and I take a reading off the skin tone the camera will give me a correct exposure based on my model’s skin being mid grey
Notice how the image is well exposed and I have detail in the whites.
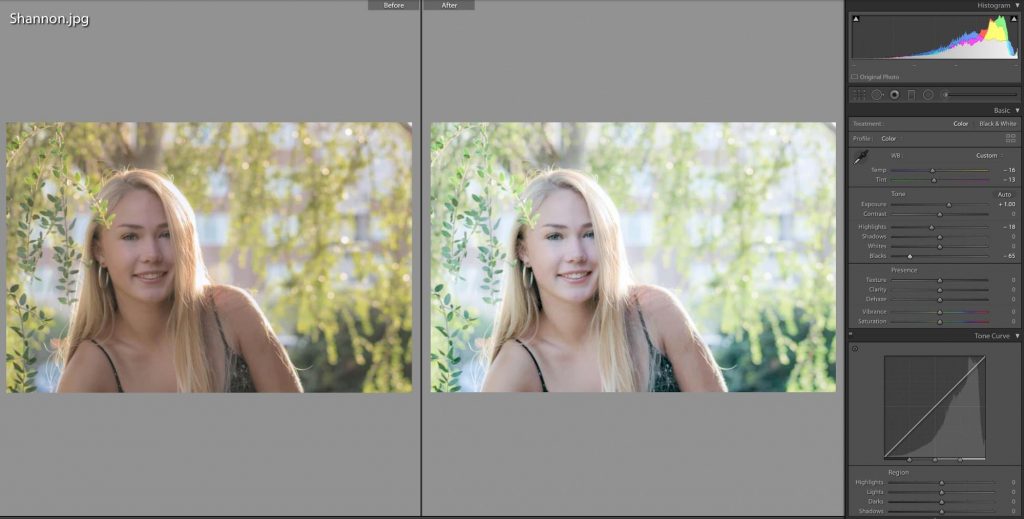
The problem with this average setting is my model’s skin is not average. It’s pale, white skin so i need to compensate for this and give my image a brighter exposure by adjusting my aperture or shutter speed or ISO until my camera meter is at +1 stops
Here is an example of my model that has been overexposed by 1 stop. The skin tone is now a more accurate reflection of what my model really looks like
- When I’m photographing most skin tones I find they look better overexposed by ½ to one-stop
- Darker skin tones will be automatically overexposed by the camera meter
- The camera’s meter will average black skin to mid-grey, which is too light so you will need to compensate by underexposing the skin by ½ to 1 stop.
- If you are shooting in auto mode trying bracketing +1 stop -1 stop
- If you want to nail the perfect skin tone every time, get a light meter.
Aussie Slang word of the week
Woop Woop: middle of nowhere “he lives out woop woop”
Join the So you want to be a photographer: Podcast community
Connect with us on Instagram @valeriekhoo @ginamilicia

